How do I create a return?
Last updated: May 18, 2026
Quick answer
Use this article to create a return request from Manage Returns.
Common use cases
- Customer support coordinator: Create a return request after a customer asks to send an item back.
- Warehouse lead: Prepare the return record before the item arrives at the warehouse.
- Operations manager: Make sure the return has the right product, reason, quantity, and label choice.
When to use this
- You need to create a return from a customer delivery.
- You know the client delivery ID or order context.
- You need to choose the return product, return reason, and quantity.
When not to use this
- The returned item is already at the warehouse and needs inspection.
- You need to change the list of return reasons.
- You need a refund, restock, carrier, or billing decision.
At a glance
| What you are doing | What you need | Good result | Contact us if |
|---|---|---|---|
| Use this article to create a return request from Manage Returns. | Confirm you are in the correct warehouse or workspace. Have the client delivery ID or order context. | The return order is created and can be found in Manage Returns with the correct status, approval state, return reason, and product context. | The delivery ID cannot be found, the product or return reason is missing, Create return order stays unavailable after required fields are completed, or the created return does not appear in Manage Returns. |
Before you start
- Confirm you are in the correct warehouse or workspace.
- Have the client delivery ID or order context.
- Know which item is being returned and the reason for the return.
- Decide whether the return should include a return shipment label and whether it should be approved.
Steps
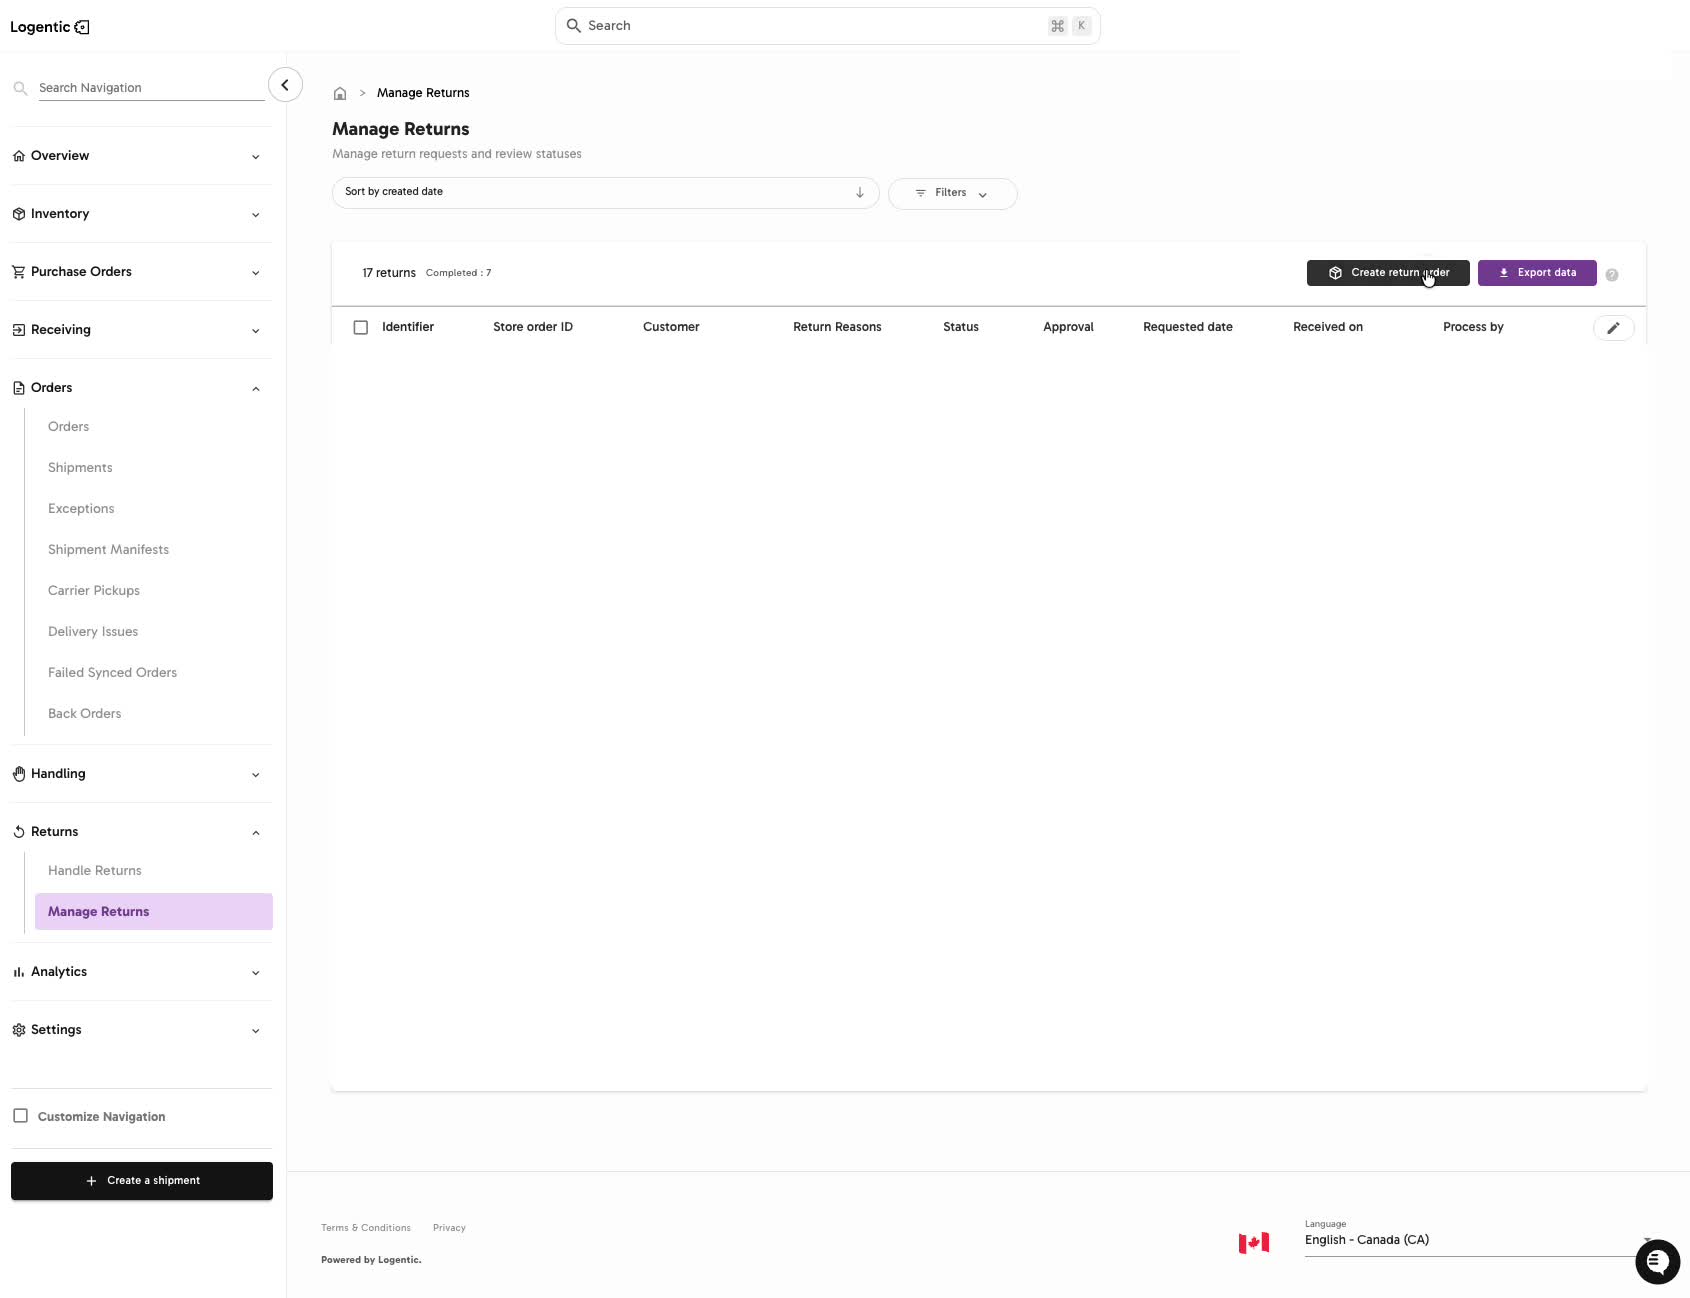
- Go to Returns in the left navigation.
- Open Manage Returns.
- Select Create return order.
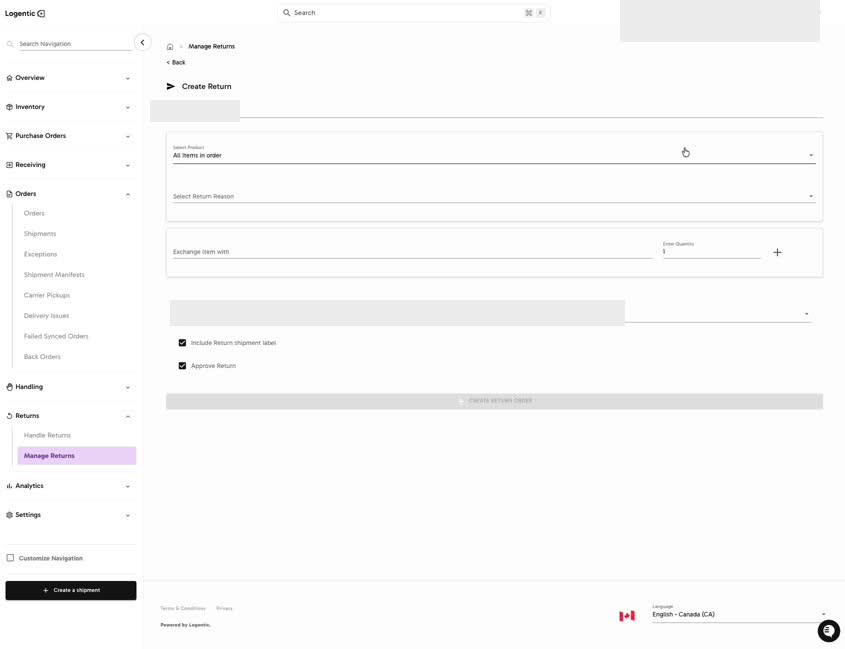
- Enter the client's delivery ID.
- Select the product being returned.
- Select the return reason.
- Enter the quantity being returned.
- Review the Ship To destination.
- Check Include Return shipment label if the return should include a label.
- Check Approve Return if this return should be approved from this form.
- Select Create return order.
Screenshots
Steps 1-3: Open Manage Returns and select Create return order.
Steps 4-11: Enter the delivery ID, select the product and return reason, review quantity and destination, then create the return order.
What good looks like
The return order is created and can be found in Manage Returns with the correct status, approval state, return reason, and product context.
Common issues and next actions
| If this happens | What to do next |
|---|---|
| The delivery ID is not found. | Confirm the ID and warehouse. Contact us if the delivery exists but Logentic does not load it. |
| The product is missing from the return form. | Check that you are using the correct delivery or order. Contact us if the customer received the product but it is not available on the return form. |
| Create return order is unavailable. | Review required fields such as product, return reason, quantity, label choice, and approval state. |
Contact us when
The delivery ID cannot be found, the product or return reason is missing, Create return order stays unavailable after required fields are completed, or the created return does not appear in Manage Returns.
Contact options
- Email Logentic Support: best for detailed requests, screenshots, or follow-up context.
- Open in-app chat: fastest when you are already signed in and need help in context.
- Call Logentic: call (855) 529-0009 for an urgent launch, warehouse, or fulfillment blocker.
- Request Slack support access: ask us to add your team to a shared Logentic support channel.
Send us this information
- Screenshot of the Create Return form.
- Delivery ID or order ID.
- Product/SKU being returned.
- Return reason selected.
- Quantity entered.
- Whether Include Return shipment label and Approve Return were selected.
- Expected result.
- Actual result shown in Logentic.
Related workflow
- Create the return request.
- Review the return in Manage Returns.
- Inspect the returned item when it arrives.