How do I choose a shipping carrier during Pick/Pack?
Last updated: May 18, 2026
Quick answer
Use this article to choose a carrier rate from the Print label panel during Pick/Pack.
Common use cases
- Packer: Choose a shipping rate after the package is validated.
- Warehouse lead: Compare visible carrier options before submitting the shipment.
- Operations manager: Understand what information to send Logentic when rates do not load or a carrier is missing.
When to use this
- You are already in Pick/Pack.
- Products have been scanned or confirmed.
- The package has a packaging type and is ready for the label step.
When not to use this
- You are using Ship Externally.
- You need a carrier billing, refund, or delivery-guarantee decision.
- You need printer setup or hardware troubleshooting.
At a glance
| What you are doing | What you need | Good result | Contact us if |
|---|---|---|---|
| Use this article to choose a carrier rate from the Print label panel during Pick/Pack. | Confirm the recipient address is correct on the order. Confirm the product quantities and package type are correct. | The selected carrier rate is submitted successfully and the order moves to the next label or completion state for your workflow. | Rates do not load, an expected carrier or service is missing, the selected rate fails on Submit, or the rate shown conflicts with what your team expected. |
Before you start
- Confirm the recipient address is correct on the order.
- Confirm the product quantities and package type are correct.
- Confirm the correct shipping integration is selected when your workspace has more than one integration.
Steps
- Complete the Pick/Pack product and package steps.
- Go to the Print label panel.
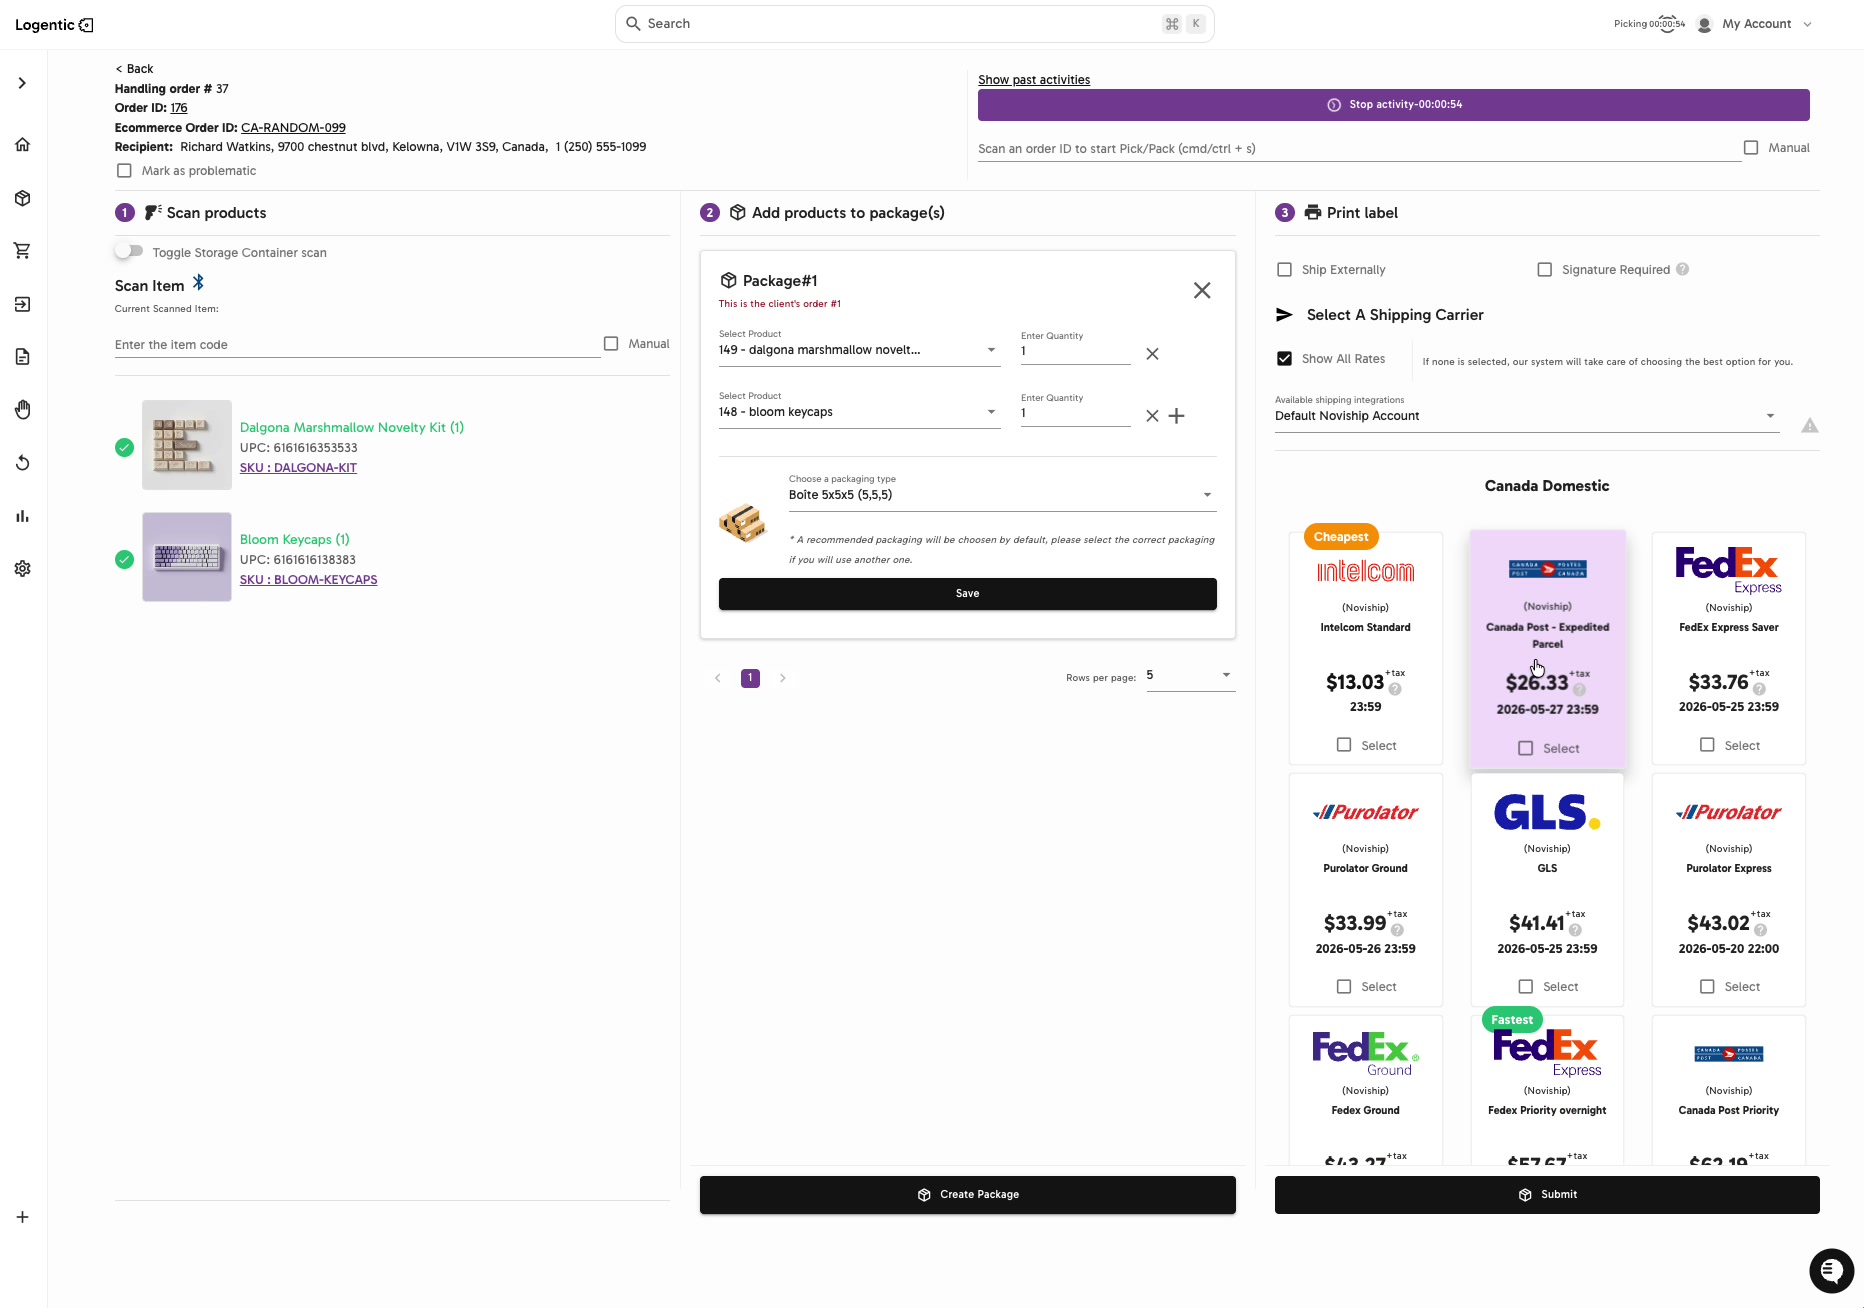
- Review Select A Shipping Carrier.
- Confirm Show All Rates is selected when you need to compare all returned carrier options.
- Review Available shipping integrations.
- Review the visible rate cards:
- Carrier name
- Service name
- Price
- Estimated date or cutoff shown by the app
- Labels such as Cheapest or Fastest, when shown
- Select the checkbox under the carrier rate you want to use.
- Select Submit.
- Wait for the operation to finish before leaving the page.
Screenshots
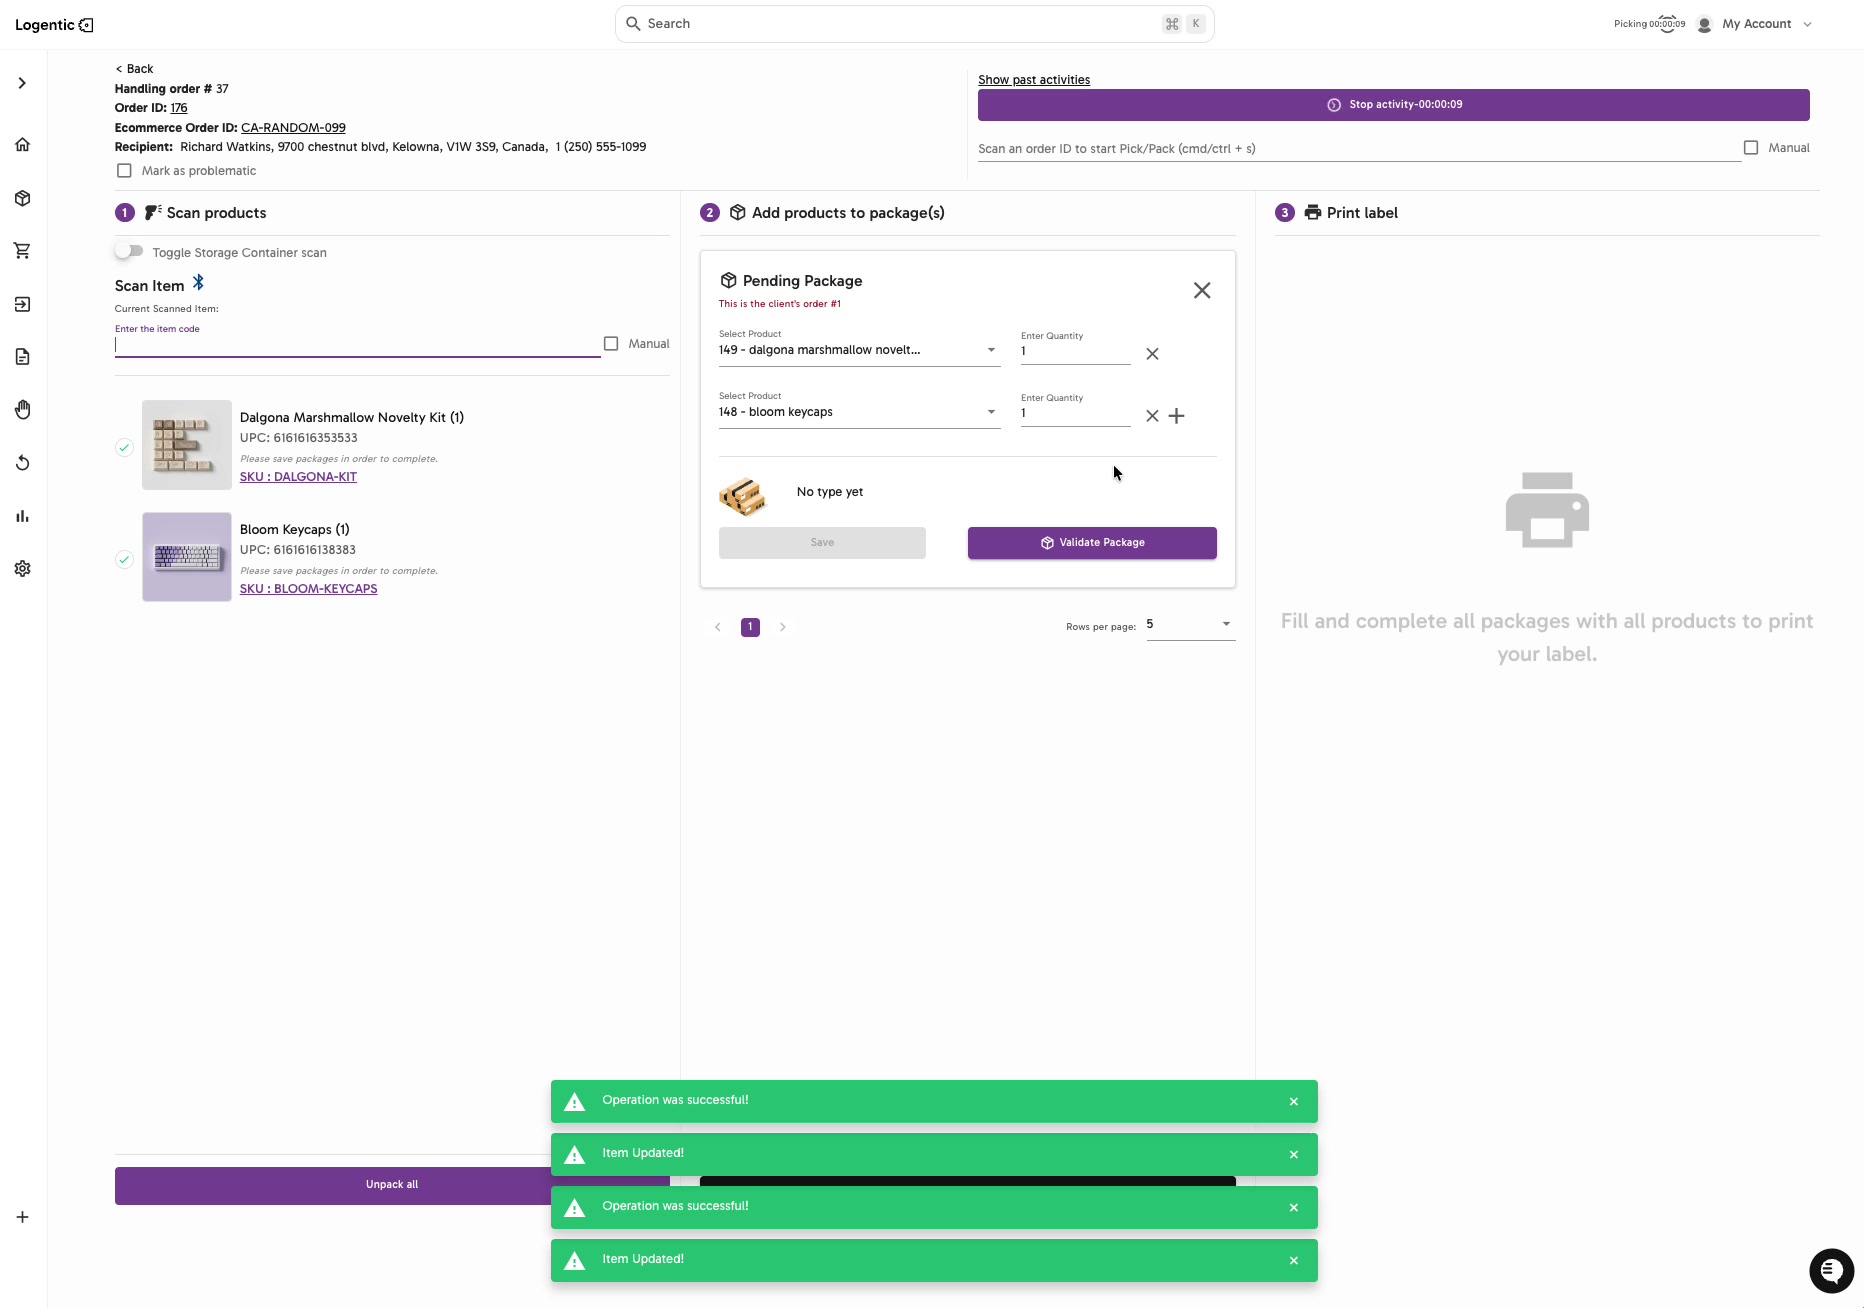
Steps 1-2: Finish scanning products and validating the package before using the label panel.
Steps 3-8: Review carrier rate cards, select the rate, and use Submit.
What good looks like
The selected carrier rate is submitted successfully and the order moves to the next label or completion state for your workflow.
Common issues and next actions
| If this happens | What to do next |
|---|---|
| No rates appear. | Confirm the package, destination address, and shipping integration. Contact us if rates still do not load. |
| The expected carrier is missing. | Check Available shipping integrations and whether Show All Rates is selected. Contact us if the carrier should be available for this order. |
| Submit fails. | Take a screenshot of the rate selected and the error shown, then contact us. |
Contact us when
Rates do not load, an expected carrier or service is missing, the selected rate fails on Submit, or the rate shown conflicts with what your team expected.
Contact options
- Email Logentic Support: best for detailed requests, screenshots, or follow-up context.
- Open in-app chat: fastest when you are already signed in and need help in context.
- Call Logentic: call (855) 529-0009 for an urgent launch, warehouse, or fulfillment blocker.
- Request Slack support access: ask us to add your team to a shared Logentic support channel.
Send us this information
- Order ID or ecommerce order ID.
- Screenshot of the Print label panel.
- Shipping integration selected.
- Carrier and service selected.
- Package type.
- Destination postal/ZIP code and country.
- Error message, if any.
- Time and timezone.
Related workflow
- Pick and pack the order.
- Validate the package.
- Choose the carrier rate.
- Submit the label workflow.