How do I create a shipment manifest?
Last updated: May 18, 2026
Quick answer
Use this article to create a Shipment Manifest for shipments that should be grouped by carrier and warehouse.
Common use cases
- Warehouse lead: Prepare end-of-day carrier paperwork before pickup.
- Shipping coordinator: Group shipments for the same warehouse, carrier, and pickup date.
- Operations manager: Review manifest details before a warehouse closes the day.
When to use this
- You need to create a manifest or SCAN form for a carrier.
- You need to review which warehouse, provider, carrier, shipments, packages, and weight are on a manifest.
- You need to generate a manifest document from the manifest detail page.
When not to use this
- You need to create the original shipment or shipping label.
- You need to schedule a carrier pickup without a manifest.
- You need a carrier acceptance guarantee, billing decision, or refund.
At a glance
| What you are doing | What you need | Good result | Contact us if |
|---|---|---|---|
| Use this article to create a Shipment Manifest for shipments that should be grouped by carrier and warehouse. | Confirm the shipments are ready for the same warehouse and carrier. Know the warehouse, shipping provider, carrier, pickup date, and pickup window. | The manifest appears in Shipment Manifests, the detail page shows the expected carrier, provider, warehouse, shipment/package counts, and the manifest document can be generated when needed. | The carrier/provider is missing, eligible shipments do not appear, the manifest cannot be created, or the manifest document cannot be generated. |
Before you start
- Confirm the shipments are ready for the same warehouse and carrier.
- Know the warehouse, shipping provider, carrier, pickup date, and pickup window.
- Confirm the carrier setup exists in Logentic if the provider or carrier is missing.
Steps
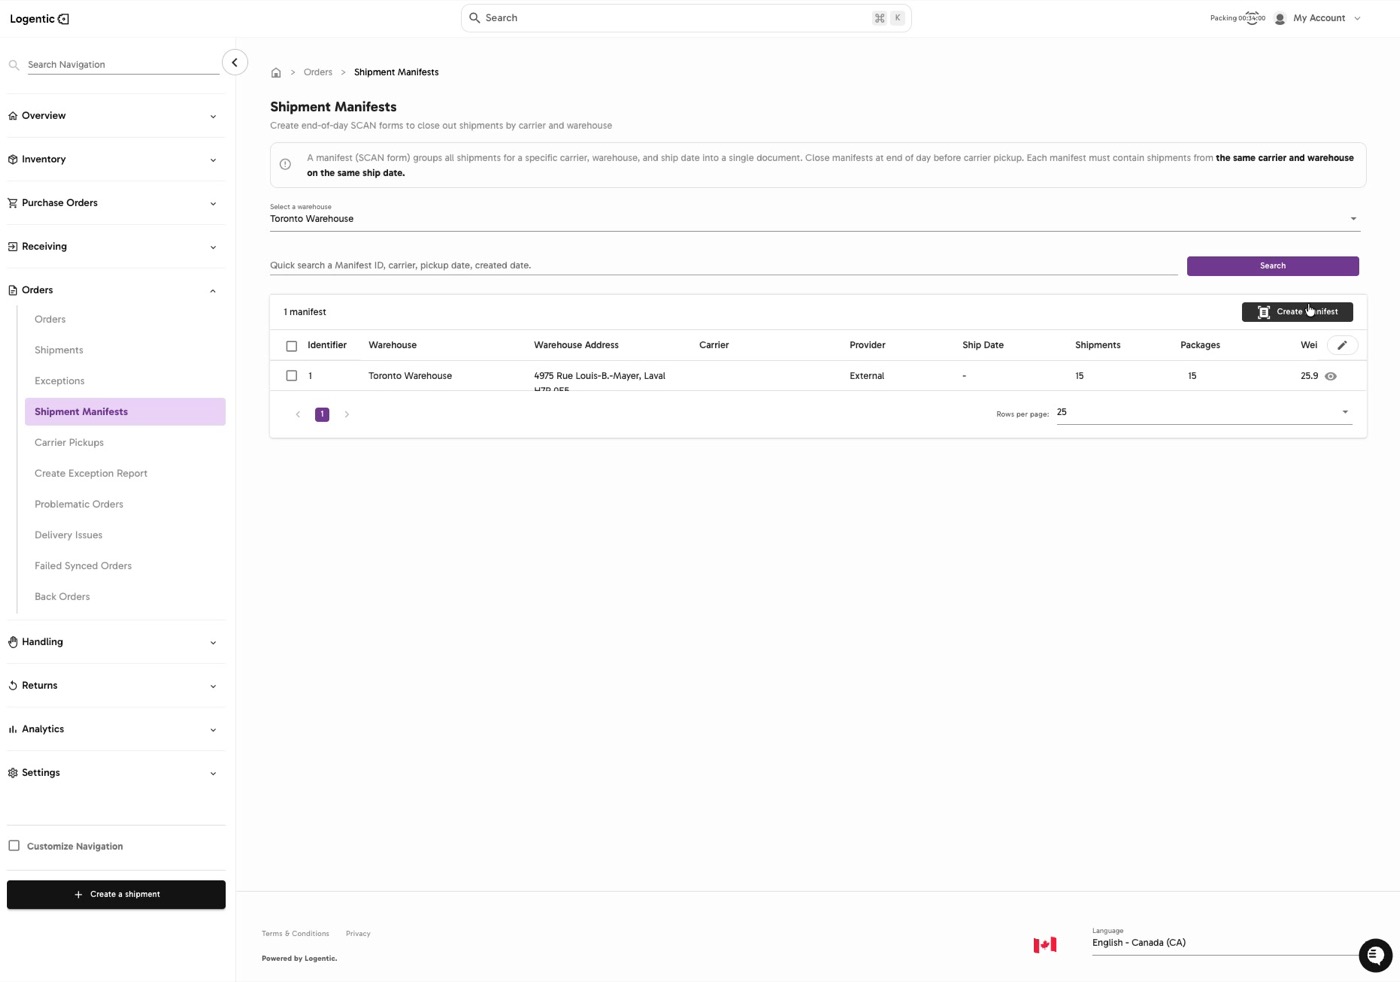
- Go to Orders in the left navigation.
- Open Shipment Manifests.
- Select the warehouse you want to review.
- Use Quick search if you already know a manifest ID, carrier, pickup date, or created date.
- Select Create Manifest.
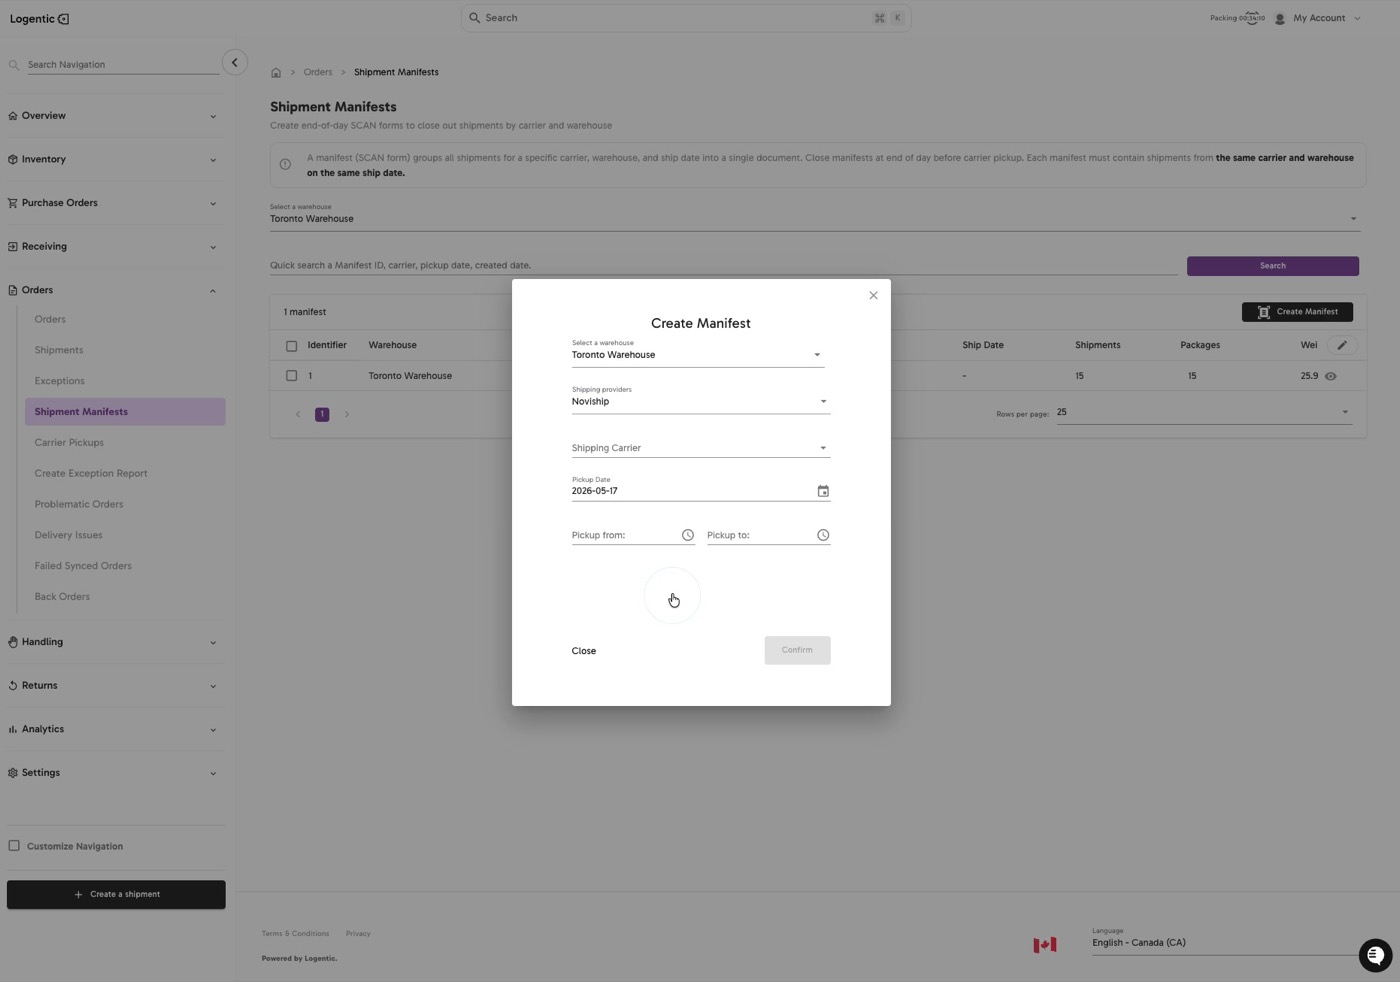
- In Create Manifest, confirm the warehouse.
- Select the Shipping providers value.
- Select the Shipping Carrier value.
- Confirm the Pickup Date.
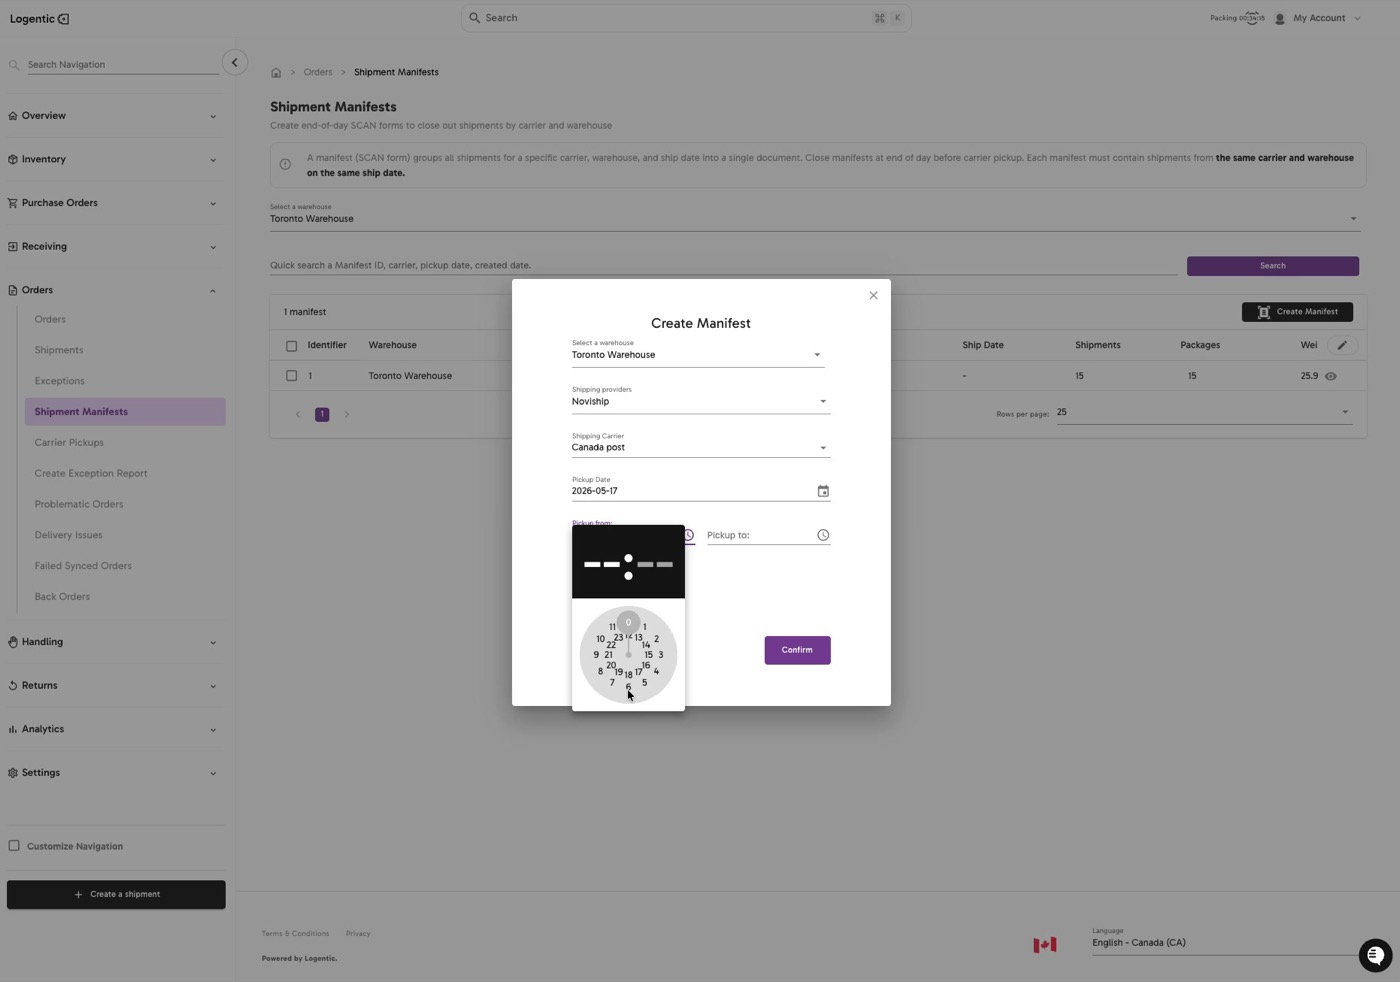
- Enter the Pickup from time.
- Enter the Pickup to time.
- Select Confirm.
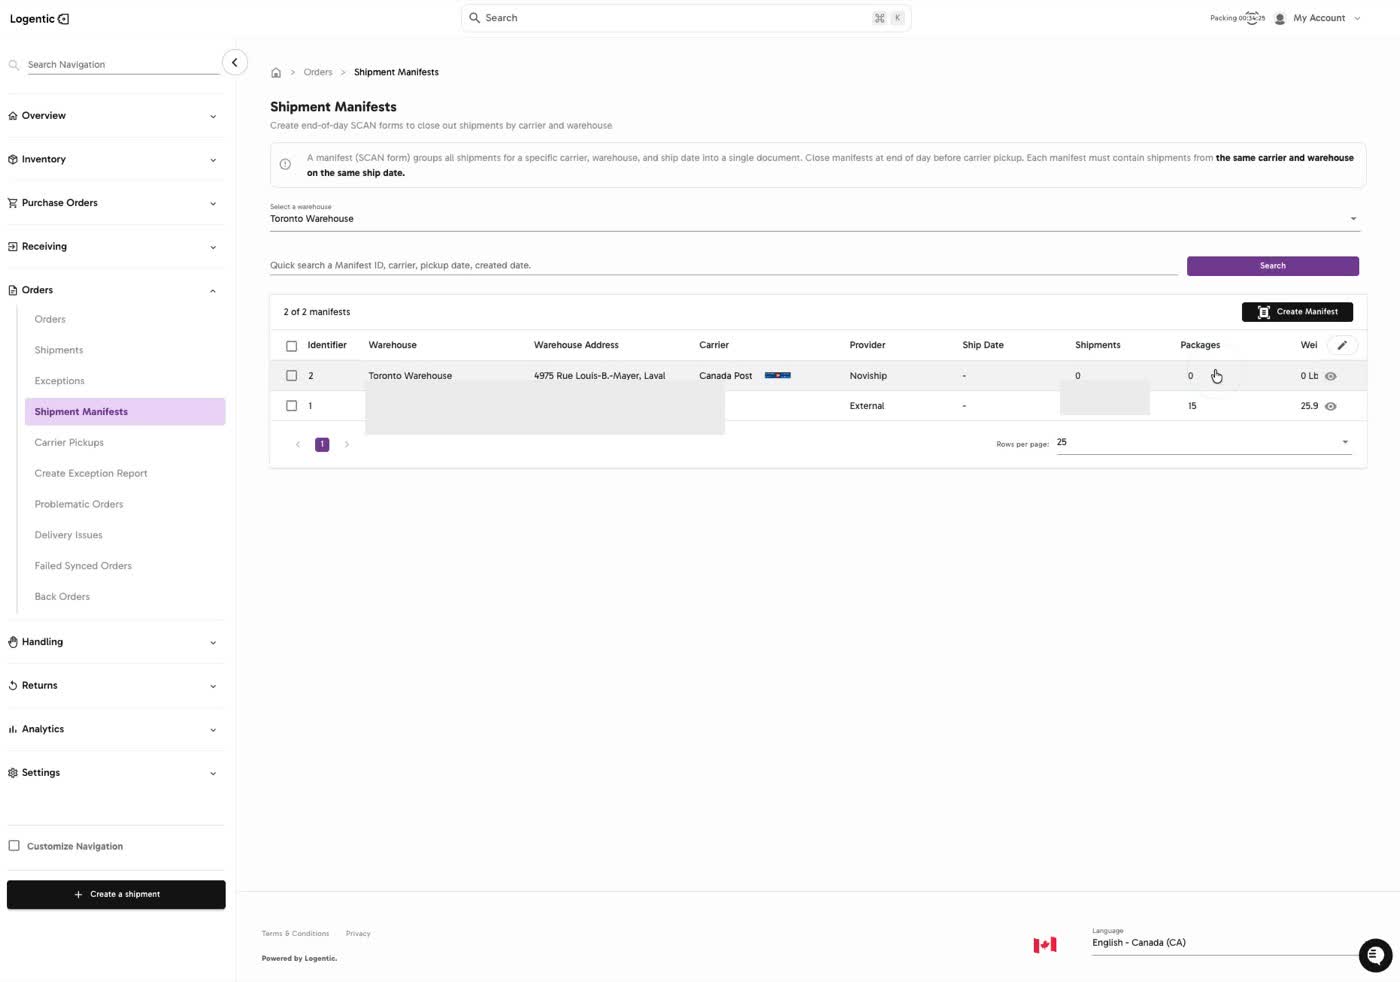
- Review the manifest row that appears in Shipment Manifests.
- Open the manifest detail page when you need to review the manifest.
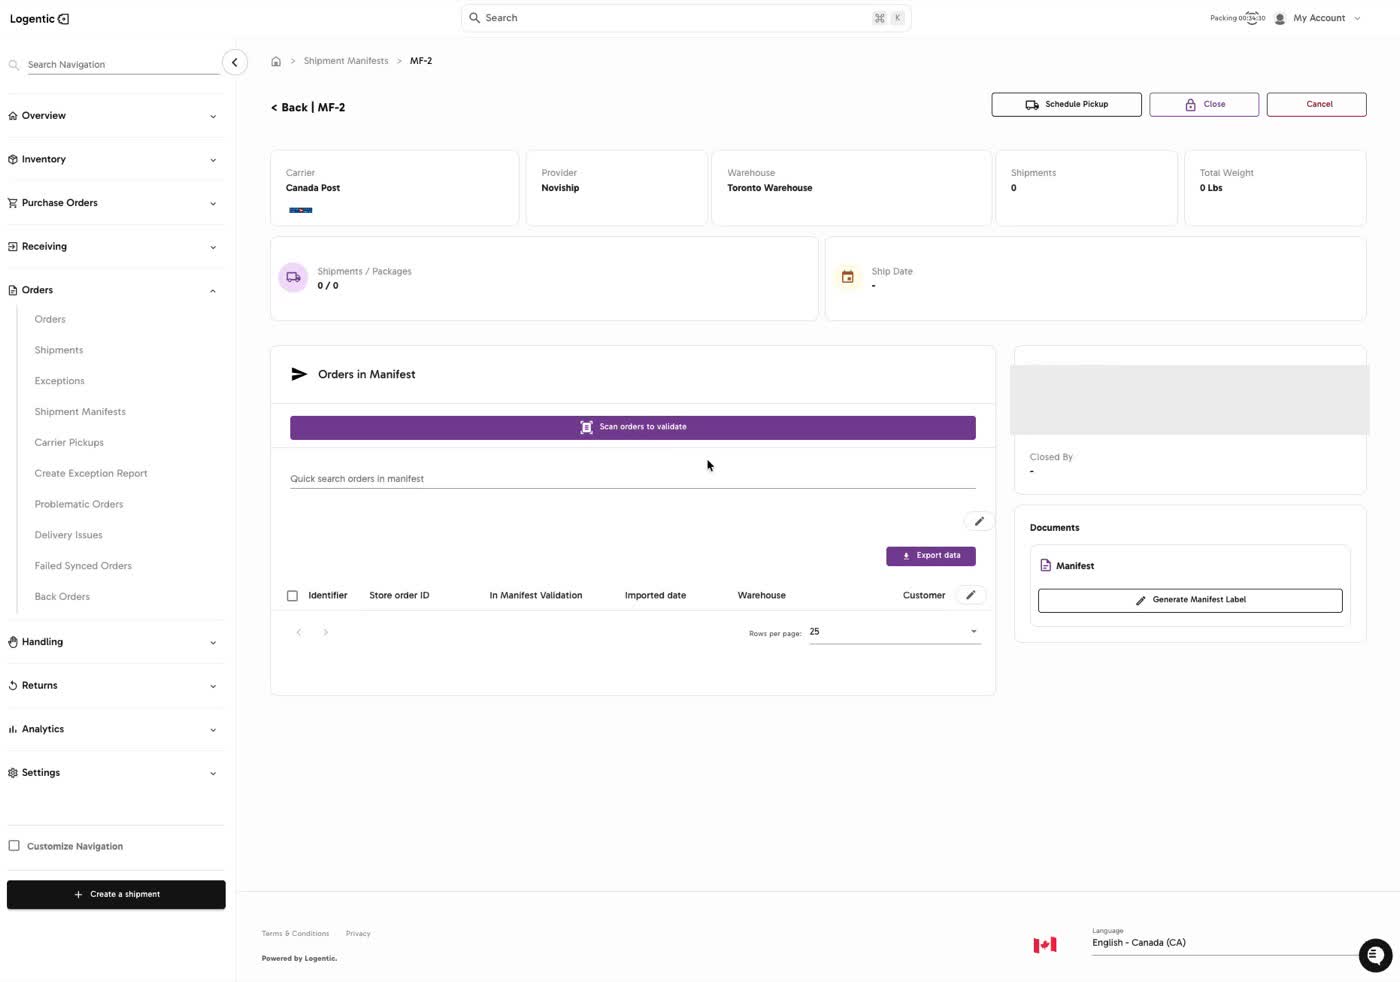
- On the manifest detail page, review carrier, provider, warehouse, shipment count, total weight, and orders in the manifest.
- Use Generate Manifest Label when you need the manifest document.
- Use Schedule Pickup, Close, or Cancel only when that matches your operational step.
Screenshots
Steps 1-5: Open Shipment Manifests and select Create Manifest.
Steps 6-9: Confirm the warehouse, select the provider and carrier, and confirm the pickup date.
Steps 10-12: Add the pickup time window and select Confirm.
Step 13: Confirm the manifest appears in the manifest list.
Steps 14-17: Open the manifest detail page to review the manifest and generate the manifest document.
What good looks like
The manifest appears in Shipment Manifests, the detail page shows the expected carrier, provider, warehouse, shipment/package counts, and the manifest document can be generated when needed.
Common issues and next actions
| If this happens | What to do next |
|---|---|
| The carrier or provider is missing. | Confirm the carrier setup exists for the warehouse. Contact us if the carrier should be available but does not appear. |
| The manifest creates with zero shipments. | Check whether the eligible shipments match the same warehouse, carrier, and ship date shown in the manifest requirements. |
| The manifest document is missing. | Open the manifest detail page and try Generate Manifest Label again. |
Contact us when
The carrier/provider is missing, eligible shipments do not appear, the manifest cannot be created, or the manifest document cannot be generated.
Contact options
- Email Logentic Support: best for detailed requests, screenshots, or follow-up context.
- Open in-app chat: fastest when you are already signed in and need help in context.
- Call Logentic: call (855) 529-0009 for an urgent launch, warehouse, or fulfillment blocker.
- Request Slack support access: ask us to add your team to a shared Logentic support channel.
Send us this information
- Screenshot of Shipment Manifests or the manifest detail page.
- Warehouse, shipping provider, and carrier.
- Pickup date and pickup time window.
- Manifest ID, if one was created.
- Expected shipment/package count.
- Actual result shown in Logentic.
- Time and timezone.
Related workflow
- Create shipments and labels.
- Create the shipment manifest for the matching warehouse and carrier.
- Generate the manifest document and continue to pickup or closeout.